A Year in the Garden…Filoli in August

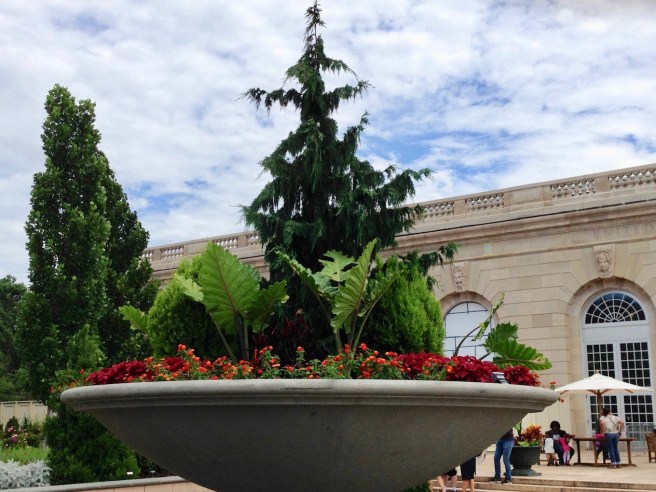
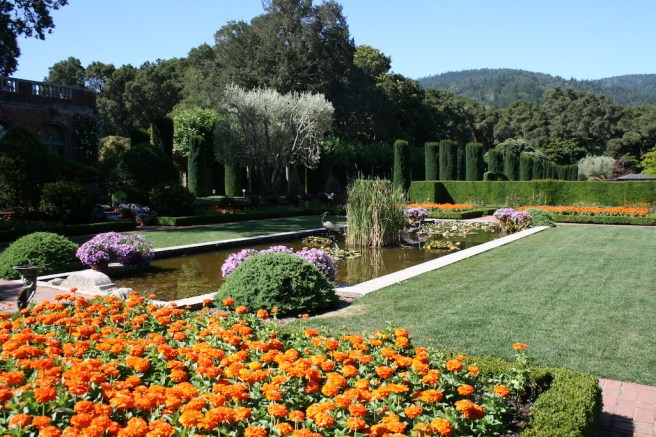
Filoli was eerily quiet as I arrived for my monthly class in this quintessential country estate of times gone by. The forecast was for a day in the low 70s which for me would be a relief from a summer with weeks on end of temps surpassing the 100 degree mark. Unlike the efforts of many home gardeners who are about ready to call it quits by this time of year, Filoli’s formal beds benefit from the June changeout of plant material from spring to summer (and staff to make it happen…I must have misplaced my own staff) and were bright, bold and thriving!

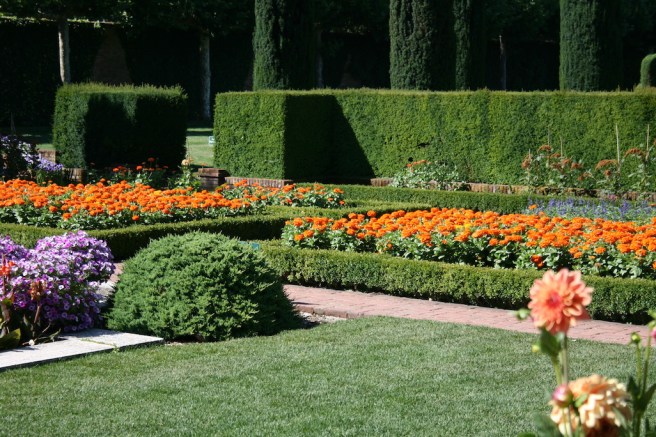
The play of the morning sun turns the sea of orange zinnias to gold! The bold color scheme of the Sunken Garden almost glows in full sun under blue skies.

Aug Filoli 16

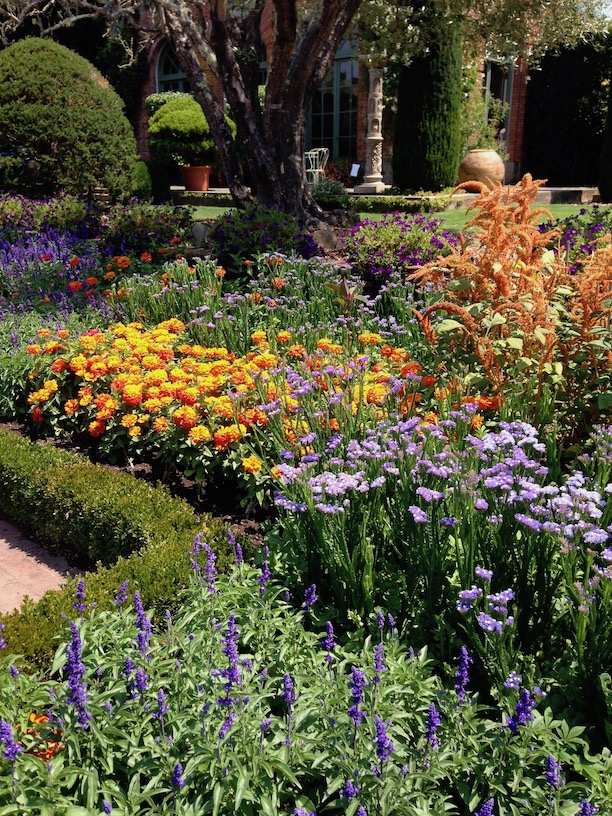
The blue mealy cupped salvia and lavender statice, barely past seedling stage last month, have come into their own. All of the annual flowers seen here are started from seed and grown out in the estate greenhouses.

Aug Filoli 6

This butterscotch colored Amaranthus was interesting. Commonly called amaranth or love lies bleeding, there are many ornamental varieties as well as whole grain varieties used as a food crop. Most of the ornamental ones I have seen are in the red and burgundy tones–slipped my mind to ask our instructor, Mimi Clarke, later in the day for the cultivar name.

Aug Filoli 3

I also enjoyed seeing the pops of white along the northwest wall provided by really nice stands of Cleome. A taller variety, the flowers topped 5 feet. I am going to find a sunny spot in the back of one of my borders to sow a packet or two of these next spring.

The garden and gift shop area was dressed for late summer also. The plants for sale often mirror what is prominent in the garden at any given point–today was a bit of an exception with this nice display of succulents.

Aug Filoli 2

Aug Filoli 1

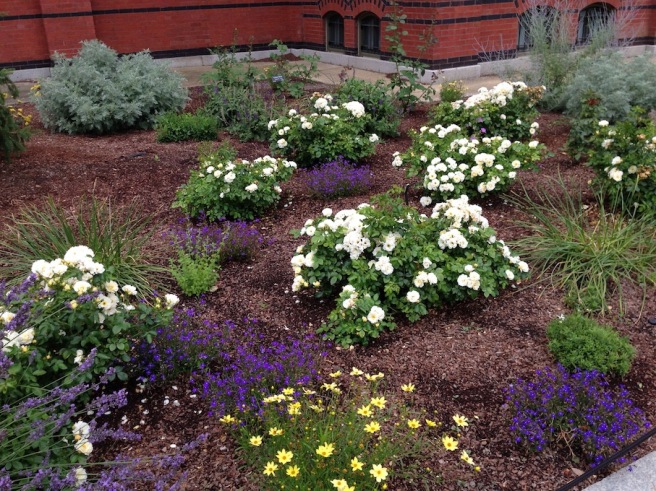
My usual route through the Walled Garden to my potting shed classroom allows me to check in on those disappointing begonias I noted last month. They have filled enough now to give me a grudging smile.

Aug Filoli 7

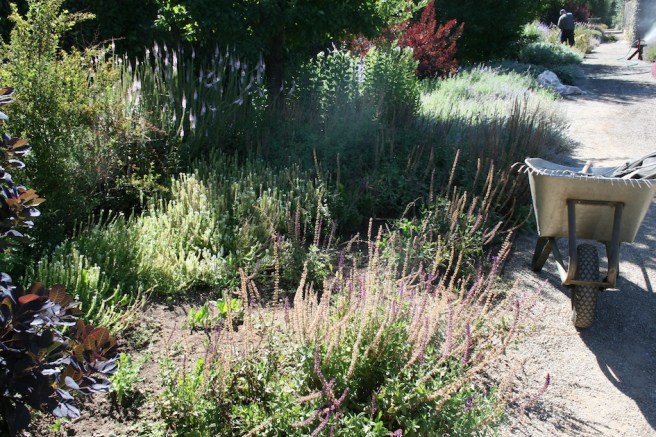
The less formal areas southeastern areas of the garden reflect more of the late summer doldrums all gardeners experience: perennials not quite fully cut back in hopes of encouraging an second flush of bloom, cutting garden annuals nearing the end of their prime time and roses looking like they have had a long, hot summer. Every month I find these areas to be a comfort. Even with a hard working staff there are always more maintenance tasks than time and hands to do them–just like my garden!

A highlight this month where the clumps of naked ladies blooming everywhere! The bulbs of Amaryllis belladonna and Lycoris squamigera both produce straplike leaves which die back in late spring, followed by long naked stalks topped with clear pink blooms.

Aug Filoli 10


Aug Filoli 8

I believe these to be the Amaryllis rather than the Lycoris due to the symmetry and more pointedness of the petals and the color of the stalks but I wouldn’t put money on it! They are in areas clearly visible from the paths but not close enough to examine on hands and knees without walking into the planted areas. Both plants are great naturalizers and resent being moved. They were very popular with 19th and 20th century gardeners and remain so today–although many folks who have them ‘inherit’ them with their property rather than having sought them out to add to the garden.

Propagation is today’s classroom and garden walk topic. As we had covered seed collecting earlier we would concentrate on asexual propagation today with our hands on focus being propagation by cuttings. The major methods of asexual propagation are cuttings, layering, division and budding/grafting. Propagation by cuttings involves rooting a severed piece of the parent plant; propagation by layering flip flops the process by rooting a part of the parent plant and then severing it. Propagation by division is accomplished by digging up the parent plant and separating it into several parts or separated off plantlets that have set down roots away from the parent plant; budding and grafting allow you to join two plants from different varieties. Excellent written material walking us through each of these propagation methods is included in our class notebooks–I have propagated by division countless times but have little experience with the other three techniques.

Mimi’s go-to advice of knowing your plant and using good references is especially apt as you try your hand at propagation. A plant’s basic genetic and structural properties can point you to the method and time at which it can be most successfully propagated. The fibrous crowns of daylilies are perfect to tease off new plants by division while a plant with a tap root like Queen Anne’s lace cannot be propagated in this fashion. Even the seasoned professional gardening staff at Filoli consult their reference materials to find out the specifics for the plant they seek to reproduce. One of her recommended text is the American Horticultural Society’s tome Plant Propagation which is well organized by plant and written at a practical level for a non-scientist–good step by step photos also.

So today we will take a look at Filoli’s propagation set up, take some cuttings from the estate and prepare them just as the staff gardeners would. The hope is that they will be sufficiently rooted for us to pot them up to take home in September.

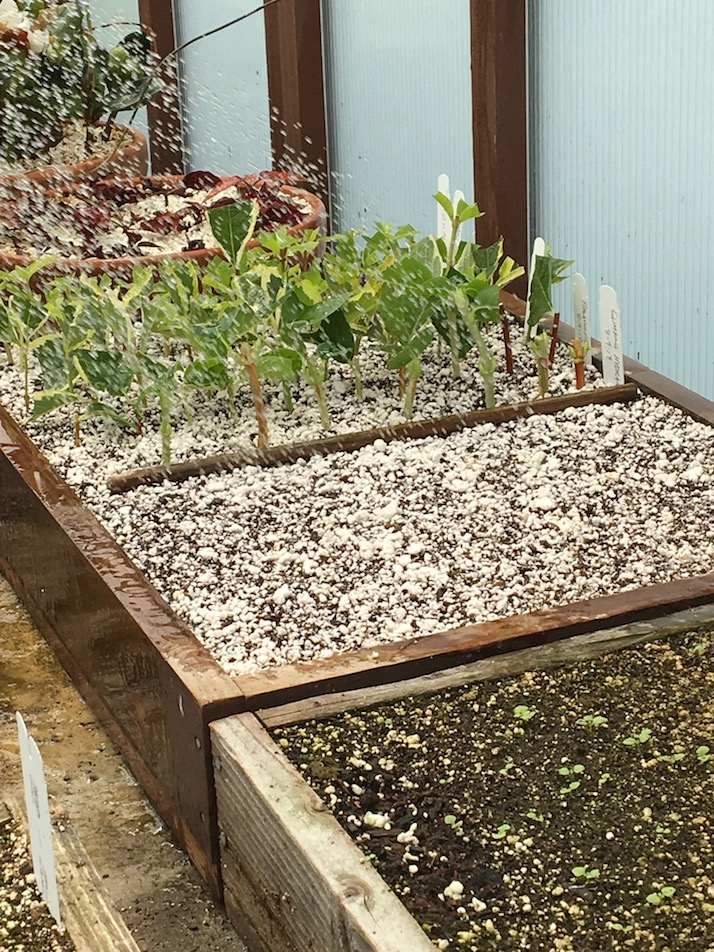
Before we head out into the garden we get a quick primer on rooting media and containers. Filoli gardeners construct propagation flats, sized perfectly to sit two deep on the tables in the propagation house (prop house), but any box that will provide suitable drainage can be adapted. The rooting media (soil) should be clean, porous enough for root aeration and drainage but also capable of water and nutrient retention. An easy mix to start with would be 50% peat moss and 50% perlite–dampened, mixed and pressed into your rooting container. Let’s head into the garden!

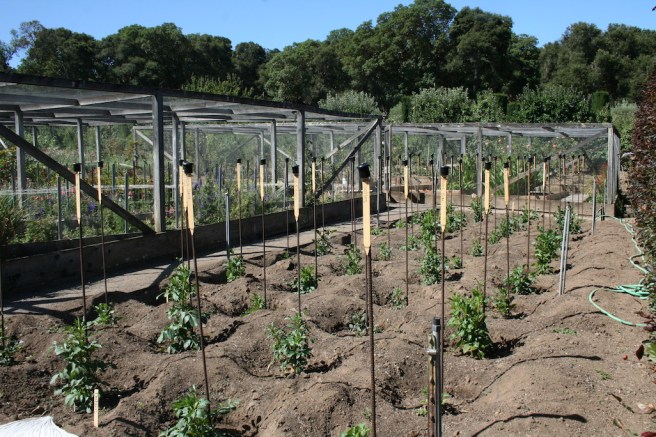
We stop outside the propagation house to see what is hanging out in the cold frames. Cuttings which have rooted well are potted up (usually to 4″ pots) and moved outside to acclimate. There are a number of cold frames throughout the ‘working’ areas of Filoli and at any given time they contain a mixture of potted up rooted cuttings, divisions and grown out plants waiting to be switched out in the display areas or bound for the retail shop.

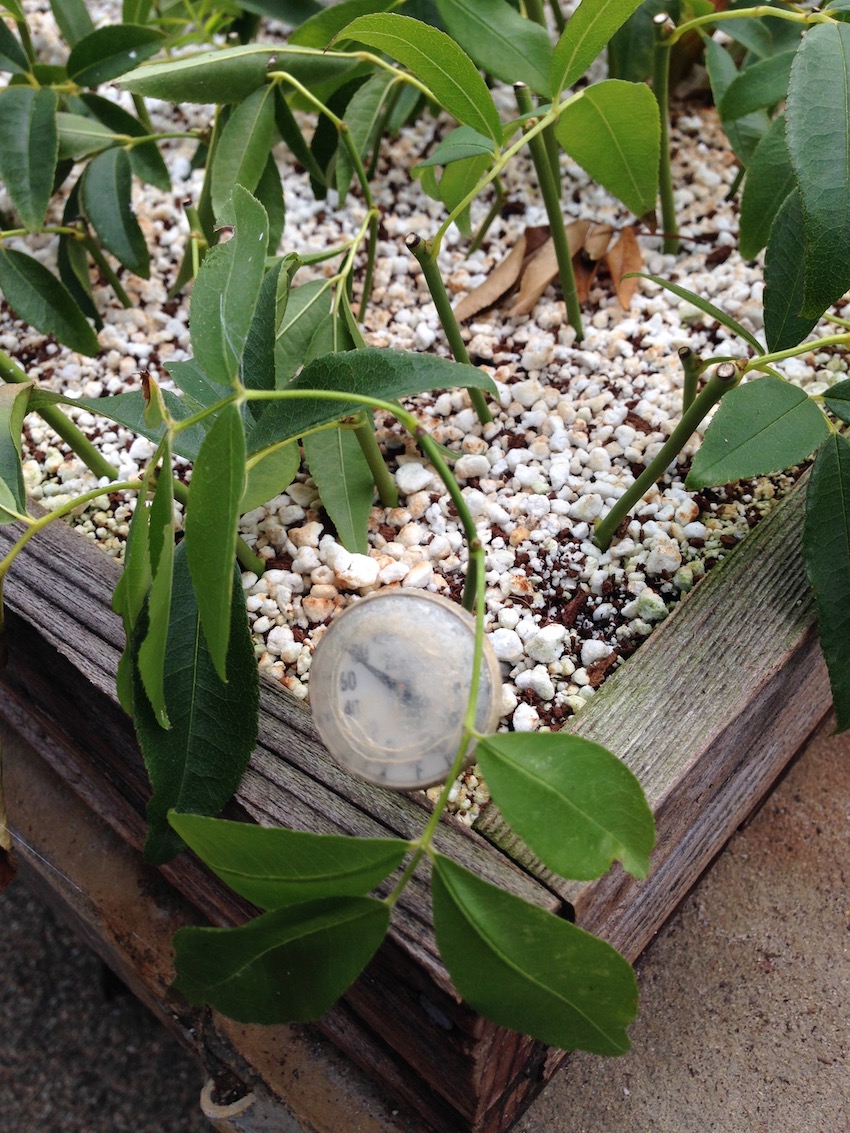
Inside the propagation house, pots and flats–check out Filoli’s perfectly sized wooden rooting boxes–are arranged on the concrete tables on either side of the structure. These tables are original to the prop house, which dates very early in the estate’s history. The tables provide bottom heat to the cuttings by means of a piped hot water system tucked up under the table top–also original and still working well. Overhead misters and fans provide the ongoing constant moisture needed for root development. Temperature of the rooting media is monitored by a thermometer in the box or pot and adjustments are made to the climate as needed. Everything is labeled with the plant name, date and often where the particular cuttings were taken in the garden.

Our next stop was one of the large greenhouses adjacent our classroom–this one houses many of the potted tropicals that rotate through the house and a host of succulents plus anything else that just needs a temporary home inside. We are catching this house at a time just past the last large annual changeout (June) and before flats are seeded in the fall with next year’s spring annuals. Mimi tells us that much of what we see today will have to be moved in a month or two out to house hundreds of flats of newly germinated annuals.

Aug Filoli 23

The greenhouse features a wide center walkway going from doors on either side. The perimeter window walls have permanently fitted table space. The double wide center table seems to only allow access from one long side and it initially appears very hard to reach anything more than an arm’s length away. I was fascinated to find that this very wide and long (maybe 30 feet long and 15 feet wide?) table sits on a system of galvanized pipes that allow it to be rolled from side to side with little more than one person’s effort–thus eliminating the need for a walkway on both sides and increasing the overall storage space.

Aug Filoli 24

Additional cold frames are found on both sides of this greenhouse. In the winter months they will be covered to prevent heat loss.

Aug Filoli 27

In the center of the above photo you can see pots of young Taxus baccata ‘Stricta’, the Irish yew, which is one of Filoli’s signature plants. Prominent in the original estate landscape, many of them on the grounds are decades old and there is a constant need for replacements. The original yews were started from cuttings taken from trees at Muckross, the Bourn family estate in Ireland. The cuttings were then planted at Mr. Bourn’s Empire Mine until Filoli was ready for landscaping. Every Irish yew replacement is grown from a cutting of one of the original plants.

Aug Filoli 11


We came upon this artful stack of wine boxes in the covered work area behind our classroom–looks like some quick minded gardener had snagged them to use as boxes for rooting cuttings and starting seeds. Some of my classmates opine that they were perfect in size and shape and muse about how they could explain to their spouse that they need to buy all their favorite wines by the case now so they could have these great boxes as a bonus!  On to a lightening fast lunch so we can get back out in the garden to get our cuttings!


Mimi had planned for us to take cuttings from Weigela florida and Aloysia triphylla (lemon verbena), both robust deciduous woody shrubs that we had talked about on earlier garden walks. Special request cries arose for Philadelphus (mock orange), Hydrangea anomala petiolaris (climbing hydrangea), and a specific camellia. Clippers and brown paper bags for collecting in hand we’re off!

Everyone takes a turn at snipping, looking for supple disease free whips to harvest. On the left you see the brick wall of climbing hydrangea. Having done our research in the classroom on each of the proposed selections we had learned that this slow to establish but eventually very aggressive deciduous vine is best propagated in the spring when it is just beginning to produce new roots at the nodes to help it cling to its support (wall). Armed with the knowledge that the success rate for our late summer cuttings may not be high, we are still going to give it a try–I read recently a quote “If you are not killing plants you are not stretching yourself as a gardener.” So there. Now if I can only get the man I share a checkbook with to adopt that philosophy…

Back in the potting shed our booty is spread out by variety and we get a quick demo on where individual cuts should be made so that every cutting has a node which will be down in the rooting media and one exposed to the air which will produce new growth.

Aug Filoli 29

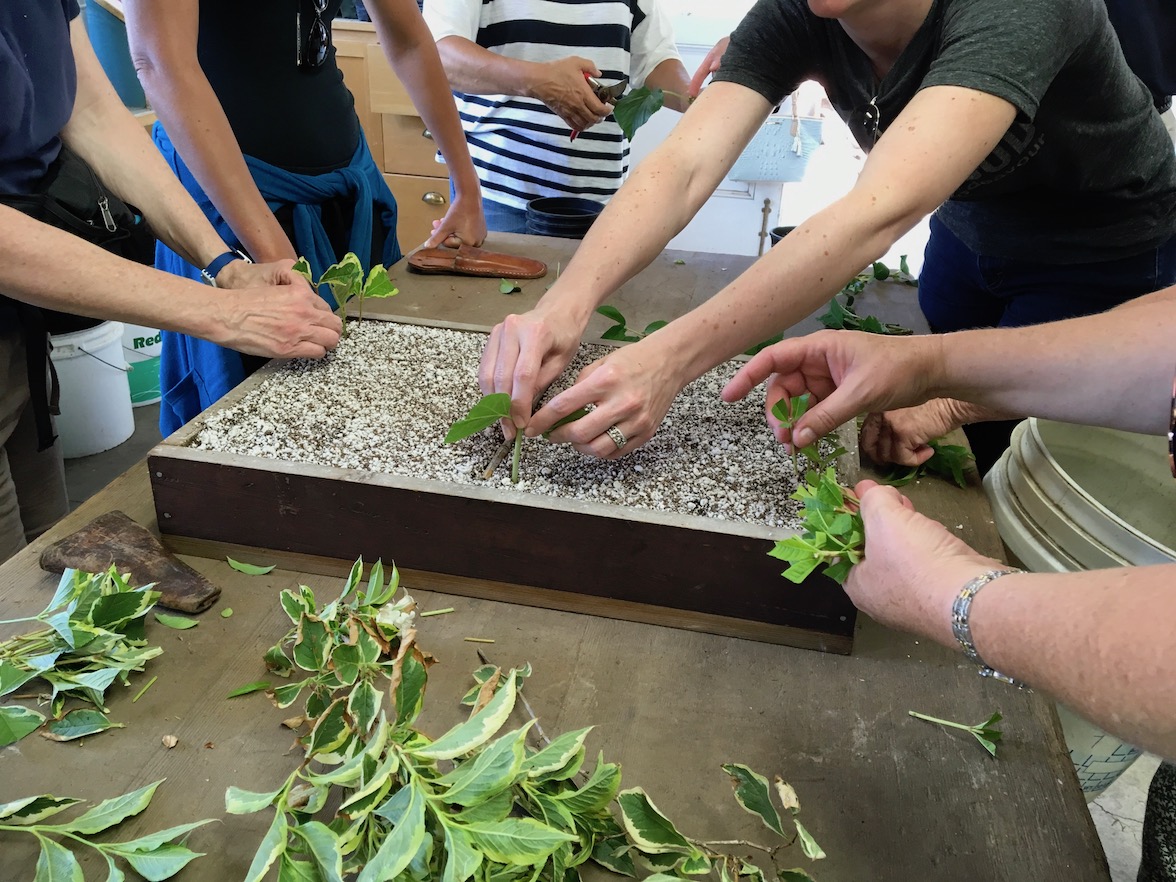
We divvy up into teams and to prep our plant’s cuttings and organize our rooting tray, keeping like cuttings together in tight rows. Labels are made and added to the tray at each point where the plant type changes. We are sharing our tray with the Saturday class it is amazing how many cuttings we got into our half. You can see above we originally started to fill the tray from both sides but ended up relocating them to our designated space. ‘Tray management’ may seem to be a facetious concept but it really critical in knowing what and when you’ve planted and keeping your propagation efforts organized.   Just like so many things in life that you think you will remember exactly what and how you did something (on the day you actually did it)–the reality is that a week later it is all going to blur together!

Like a dozen proud parents we walk our tray to its place in the propagation house. Mimi Clarke gives it a gentle spray. If gardeners gazing with pride and love can make plants root these babies ought to be 2 feet high by next month!

The September meeting will be our last meeting of A Year in the Garden. We will close our time together talking about winding down the garden in fall. Our individual projects are due and we’ll have the opportunity to see what everyone else has done–no pressure here–and hopefully have well rooting cuttings to add to our own gardens as reminders of the time we have spent at Filoli.

Aug Filoli 13
Hydrangea macrophylla–possibly ‘Ayesha’–with beautiful cupped sepals.


United States Botanic Garden

Located at the foot of the United States Capitol, the United States Botanic Garden (USBG) was established by Congress in 1820. George Washington had a vision for a botanic garden which would demonstrate and promote the importance of plants to our young nation. Today, three garden spaces make up the USBG: the Conservatory, the National Garden and the adjacent Bertholdi Park. Approximately 65,000 plants are maintained for exhibition, study, conservation and exchange with other institutions.

The Terrace Garden entrance to the Conservatory offers a peek-a-boo view of the United States Capitol building.

USBG 13

This gigantic shallow container, housing an interesting mix of tropicals and conifers, is the Terrace Garden’s focal point.  The architectural conifer in the background bed appears to sprout from the super-scaled dish garden!

USBG 12

Although I am not a huge fan of the heavy humid air of indoor conservatories, my analysis of this day’s prevailing weather was that inside the big glass house could not be any worse so…

The Garden Court acts as an anteroom for the plant life of the Tropics. The mirror image shallow reflecting pools are beautiful and the aqua tile and sparking water offer visual relief from the sultry day.

USBG 20

USBG 15

That would the Tropics be without a massive Ficus aurea?

USBG 16

Additional collections from around the globe are housed in several auxiliary glasshouses that surround the two story main conservatory. I walked all over the world on these wide flagstone paths!

The National Garden, established in 2006, was originally conceived in the late 1980s to features roses which had been declared the national floral emblem in 1986. The concept was later broadened to include native Mid-Atlantic plants (dubbed the Regional Garden), pollinator attracting plants and a fountain celebrating the First Ladies.

USBG 7

The Rose Garden

USBG 6

The First Ladies Water Garden

USBG 10

Above and below–small sections of the Butterfly Garden. Many evergreens are incorporated here to maintain garden interest during the dormant season.

USBG 9

Views of the Regional Garden

USBG 1

USBG 2

USBG 4

As with many of the gardens I visited on and around the National Mall, this garden was being used for rest and respite by both adults and children. There were folks eating lunch, reading the daily paper and just absorbing the surrounding nature. Large enough to provide a bit of insulation from the hustle and bustle outside its fences but small enough to pop in on from the street without needing a map to find your way out.

USBG 11

A Year in the Garden…Filoli in July

So let’s take a detour 3000 miles west of the wonderful gardens I saw as part of my recent trip to Washington D.C., Maryland and Virginia to check in on one of the San Francisco Bay Area’s most beautiful garden estates. I have a single public garden and two private ones still in the wings to share so don’t think the party on the East Coast is over quite yet.

I was a bit late getting on the road to Filoli, limiting my pre-class photo opportunities. I have been watching these pollarded trees since February. Take a look at how they have developed.

I think by October the leafy allee will be complete–then in a month or so the pruning process will start all over again. Just another example to remind me that this estate was built during a time of prosperity and by people with substantial resources to provide the regular maintenance required by this, and many other examples on the property, specialty pruning technique.

July Filoli 5

I arrived in the Sunken Garden just in time to catch this interplay between a visiting heron (birdwatching friends–feel free to correct me on this) and the bronze herons who inhabit the pond.

July Filoli 4

A bit too early in the day for these to be open.

July Filoli 2

On my June visit the garden staff was busy clearing out the last of the spring annuals, amending the beds and putting in the summer color. Bright orange Zinnias take center stage in the boxwood edged beds, complemented by blue Salvia farinacea. Some of the last planted pots of blue pansies remain and new pots packed with petunias in purple tones have been added.

July Filoli 6

July Filoli 3

Bed areas adjacent to the steps down to the garden are accented by small stands of apricot dahlias.  In spite of the fiery color scheme, the summer garden seems quite restrained in comparison to the spring planted beds just past.

July Filoli 7

No buds last month…in full bloom today!

I will admit to being a little disappointed in the new planting in the Walled Garden, which lies between the Sunken Garden and the Rose Garden. Although I recognize that Filoli attempts to keep the all the gardens planted in the style of the 30s and 40s when much of the landscape was enriched by the estate’s second owners, Mr. and Mrs. William P. Roth, the rows of small pink begonias fell flat for me and the pale lavender petunias just disappeared into the strong sun.

July Filoli 10

In the Rose Garden, much was still in full bloom. A good bit of deadheading was called for on some of the earlier bloomers and that worked out well for one of today’s class topics–Pruning Principles II.

In March we concentrated on the basics of pruning–why pruning is needed, what tools are available and how to make a good cut. We also learned the 4 basic pruning methods: pinching, thinning, heading back and shearing. Most of our practical application in the garden involved spring flowering shrubs that flower on old wood such as the flowering quince which is pruned immediately after blooming to permit new wood to develop for the following season’s growth. If I could take a pruning class every month year after year, I would still sign up for another. Pruning is an art and, as such, improves with practice. As a hobby horticulturalist I still do not have a wealth of pruning CONFIDENCE even though I have a pretty good intellectual grasp of the how-tos!

Yet again, instructor Mimi Clarke stressed the importance of understanding the plant’s natural habit, when it blooms and whether flowers are produced on new growth or last year’s growth. Know what you are pruning and how it grows before you even get your clippers out of their sheath. Her reference recommendation from March lingered in my head–the American Horticultural Society: Pruning and Training by Christopher Brickell and David Joyce. I found the newest edition (2017) online. I am not sure why the book no longer bears the AHS logo but I am reasonably sure it has nothing to do with the actual content and wanted the most recent edition.

July Filoli 22

There are very specific instructions, including timing and technique for hundreds of plants. Many plants that don’t have their own listing are included at the end of each section with a notation to “prune as_____________” with reference to a plant whose pruning scheme is similar. I bought the paperback so I could feel ok about dragging it around the garden and filling it with notes!

On our garden walk in search of plants needing a snip or nip we stopped at the Rose Garden where Mimi showed us examples of correctly deadheading roses to encourage new blooms. The three Ds (dead, diseased, damaged) come into play here. Mid summer is a good time to thin out some of the interior growth, especially when the inevitable black spot, rust or powdery mildew are present, to increase air flow and generally shape thing up. For many years I have done a pretty hard cut back midsummer on both roses and perennials and find that little bit of downtime now pays me back two fold in a more healthy and longer flowering period into the fall. Even an old gardener needs a little validation now and then.

July Filoli 18

Check out the height of these roses in relation to Mimi. In our discussion we agreed that it may be time for these quite old roses to be pruned back really hard in January to decrease their overall size and reinvigorate them.

We wandered toward the Perennial Border and found the staff gardeners nipping into the Veronica ‘Pink Damask’ and salvias that had been spectacular less than a month ago.

July Filoli 11

Most of the fabulous garden photos we see in the magazines and books are of plants at their absolute peak. The truth is that most perennials, even those with relatively long bloom periods, are only at that peak for 2 or 3 weeks in a season. Secondary bloom flushes can be stimulated with a dedication to deadheading. Even if you have ignored the spent flowers many perennials will signal their needs to be tidied up a bit by developing new growth at the crown. Below you see the Teucrium chamaedrys used as a border in the knot garden.

July Filoli 17


IMG_2559

In the lower photo the Teucrium (commonly called wall germander) is the bright green in the lower left corner. In June, it was not yet in bloom. The bloom detail above shows that it will only be another week or two before all the germander will need to be sheared back. Another bloom is not guaranteed but the least you have done is to neaten it up for the fall.

We finished our morning with a pass through the orchard. The variety of fruit trees call for a variety of pruning schemes–the key, of course, is to know your tree and how it produces fruiting wood. There’s a nice crop forming on the row of espaliered apple trees.

July Filoli 19

Thank you, Mimi, for the wonderful written resource material included in our notebooks! I can use all the visual aids I can get to work through my pruning challenges.

Pest Management was our afternoon topic. Within the 2 hour window to cover this never ending subject Mimi stated the obvious: no way we can even mention every insect or disease, much less how to handle it. She took a practical approach: you will have pests, whether insects, rodents or disease AND your goal will be to MANAGE them as best you can.

Mimi’s philosophy on problem solving starts with trying to prevent those problems from ever showing up in your garden. Prevention starts with a healthy garden. To that end: LEARN to ask the right questions when buying plants; DIVERSIFY your plant selection; PREPARE your soil and REGULATE your irrigation practices.

Determine what population level (disease or critter) is acceptable to you. Eradication may not be a practical goal. Then look at CONTROL on four levels, using chemical controls as your last resource.

CULTURAL CONTROLS might include selection of resistant varieties, companion plantings, sanitary practices, pruning and proper use of fertilizers and water.

MECHANICAL CONTROLS can include mechanical devices such as paper collars around plant stems or sticky barriers on trees, hand picking of pests, water blasts and traps appropriate to the critter.

July Filoli 20

Filoli’s staff garden grows their berries totally encased in wire structures to discourage raccoons and deer. Below you see row cages that can be placed over seedlings for protection.

July Filoli 21

July Filoli 13

Even parts of the extensive cutting garden used for arrangements for the house and Visitor Center are permanently covered in wire mesh. The staff gardeners creatively fashion new cages, collars and trap routines to keep all the wildlife under as much control as is practical.

BIOLOGICAL CONTROLS are defined as any activity of one species that reduces the adverse effect of another and might include the introduction of parasites, pathogens, predators or competitors.

CHEMICAL CONTROLS are used when non chemical approaches have failed.

Mimi lists these steps to use when you detect a pest, weed problem or disease in your garden:

  • Correctly identify the problem
  • Determine if you can tolerate it or if it needs to be corrected
  • If your goal is correction, use mechanical/physical controls above first
  • Still need help, determine if a biological control is available
  • When pesticides are your last resort, read labels carefully and choose the product that has been identified as the most effective
  • Apply proper amounts in confined areas

I really appreciated this process driven approach to pest management. My tolerance for insect pests and weeds has grown as I have aged. I no longer even have an expectation of a weed free or non-beneficial insect free garden–although I would still pay BIG MONEY for a snail free garden. I am not alone in jumping past the first 3 types of control and landing on my feet with a chemical control in my hands! My goal will be to make pest management a more thoughtful process in the future.

Our class year is winding down. In August we will spend our entire class time in the greenhouses exploring plant propagation. September will bring a overview of fall cleanup and the presentation of our individual projects.

July Filoli 12

The dahlia tubers have been planted. I hope we will get to see this in full bloom before our Year in the Garden comes to a close.


Paradise 1, parking lot 0…

Ripley 1
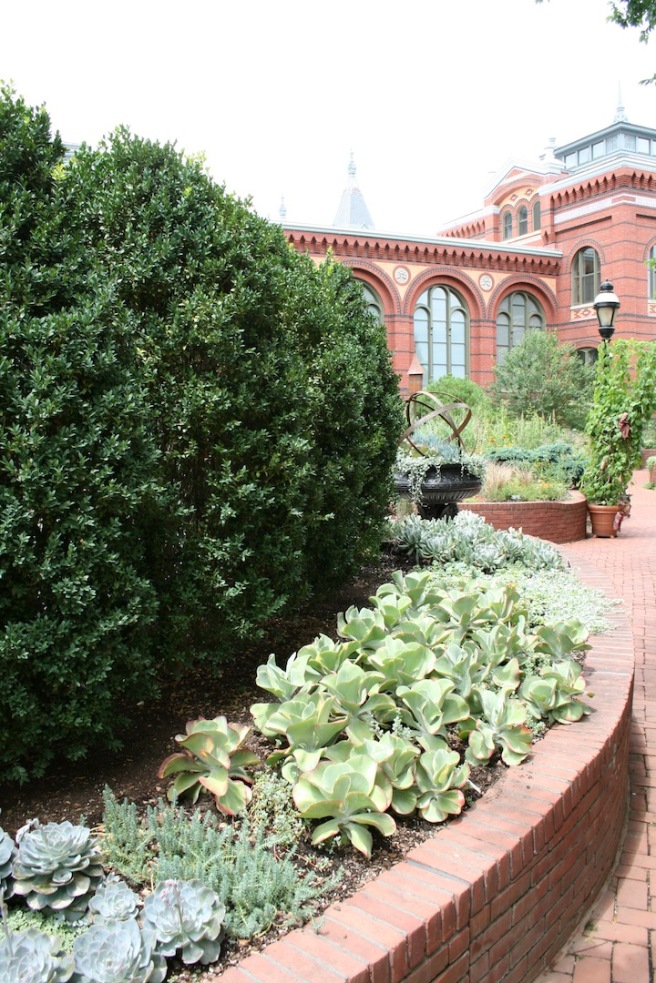
A narrow strip of land between the Smithsonian Arts and Industries Building and the Hirshhorn Museum and Sculpture Garden, once designated in the master plan of the day as a future parking lot, is the site of the Mary Livingston Ripley Garden. Mrs. Livingston, who was the wife of the eighth Secretary of the Smithsonian Institution and the founder of the Women’s Committee of the Smithsonian Associates, was an accomplished plantswoman and envisioned the open space as a “fragrant garden”. In 1978 she persuaded the Women’s Committee to sign on in support of her garden concept and the space became reality in 1988. In the early years of the garden Euonymus was transplanted from her home in Litchfield, Connecticut to form the east wall espaliers. The garden is supported today with funds from another benefactor, Mrs. John C. Folger, who established an endowment in 1994 for the care of the garden with the hope that others would be inspired by her generosity and add to the funds, enabling the garden to be enjoyed by the public well into the future.

Washington, D.C. architect Hugh Newell Jacobsen set the stage for a still evolving collection of perennials, annuals and tropicals with his curvilinear brick walkway flanked by serpentine raised beds. His use of red brick echoes the surrounding buildings and grounds the long narrow garden.

Ripley 14

Ripley 16

As you enter from the National Mall end of the Ripley Garden an airy courtyard, anchored by a large fountain, offers spots to sit in both sun and shade. As with all of the Smithsonian Gardens I visited, year round structure takes the form of groups of conifers and evergreen trees and shrubs. Current horticulturalist Janet Draper states her goal for the Ripley Garden is to expose visitors to as many different plants as possible and to “expand the plant palette.” With over 200 plant varieties represented, meticulously labeled and beautifully maintained she has certainly painted a garden picture which is both beautiful and educational.

Ripley 21

Hydrangea quercifolia ‘Alice’ reaches to the sky. Heuchera ‘Autumn Bride’, Acanthus mollis and Saxifragia stolonifera nestle at her feet.

Ripley 20

Cistus x hybridus ‘McGuire’s Gold’ is a shining light in this plant grouping. I am going to check this one out for my garden! I love how this shrub acts as a prop for some very tall lilies planted behind it.

Ripley 4

Here’s a great view of the winding chevron brick walkway which runs the entire length of the garden from the National Mall to Independence Avenue. What you can’t get a sense of is the undulation of the raised beds. At some points they are only a couple of bricks high as in this photo. At others they are raised waist high—they flow up and down so seamlessly it took me several looks to focus on the height difference.

Hosta 'Silver Bay'

There are blues and whites…

Ripley 19

Chartreuses and limes…that’s Jasminum officinalis ‘Frojas’, common name Fiona sunrise jasmine on the far right.

Ripley 22

Reds and grays–love the pop from these Caladium!

Ripley 11

Really nicely done living wall. Smithsonian Gardens greenhouse staff design and execute all the hanging baskets and containers feature in the Ripley Garden. They also propagate the annuals and care for the tropicals and succulents out of season.

Ripley 6

Cissus discolor
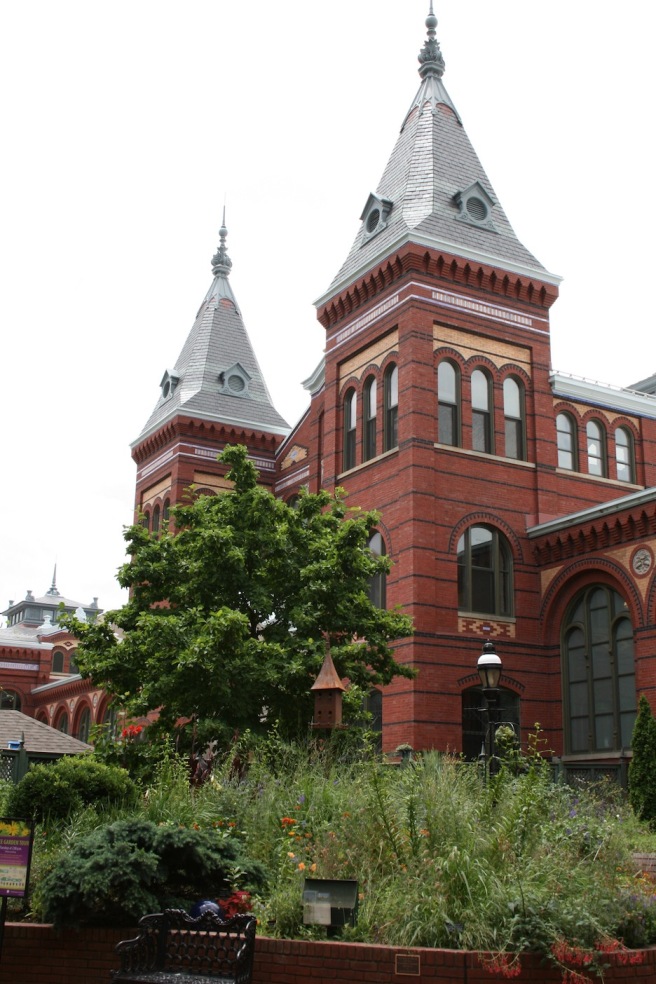
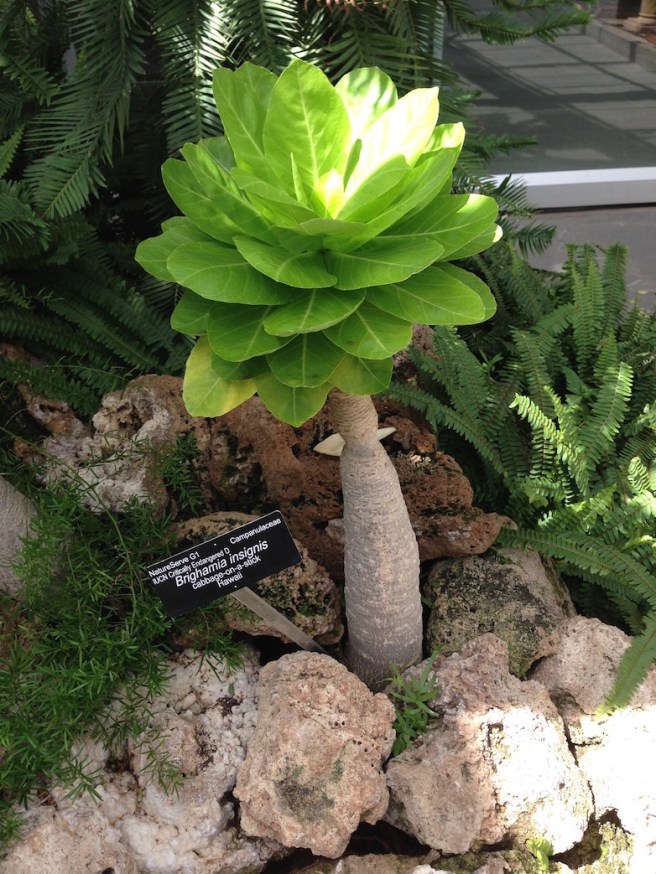
This interesting vine was new to me. Cissus discolor or rex begonia vine is being supported almost invisibly by a panel of fine chicken wire. A little research revealed that this species is a tropical and would generally be used as a houseplant in a cold winter area like Virginia. A great example of Janet’s goal to expose visitors to new and interesting plant material, in this case in  non-traditional setting.

insect house

I have been seeing these ‘bug houses’ on Pinterest for awhile now but this is the only large one I have seen in person. Not willing to miss a teaching opportunity, this great sign gives garden visitors a heads up!

Ripley 9

Hands down, the Mary Livingston Ripley Garden was my favorite of the 6 Smithsonian Gardens I saw. The original design of the curvy raised beds and brick walkways established a framework of open spaces to which structural and foundation plantings were added. Now mature, those plantings provide year round interest and a backdrop to showcase free flowing colonies of perennials, bulbs and their annual companions. This garden appealed to me as a plant collector and I am sure on every visit I would be able to see something either new to me or used in an inspiring grouping. The time and effort needed to maintain large expanses of turf or manicure bed-turf transitions can all be redirected toward creating interesting combinations of colors, textures and shapes in living plant tableaux.

Kuddos to Mrs. Livingston for pursuing her dream and creating this paradise which so easily could have become another parking lot.

Kathrine and Enid…

2017 Capitol Region Garden Bloggers Fling participants had several hours to pick and choose among the 12 Smithsonian Gardens clustered on either side of the National Mall. I am sure Kathrine and Enid would be pleased to see the public garden spaces named for them and visited by thousands of garden and history lovers every year.

KATHRINE DULIN FOLGER ROSE GARDEN

This garden is the centerpiece of the front of the Arts and Industries Building to the east of the Smithsonian Castle. The original garden was made possible by a donation from Mr. and Mrs. Lee M. Folger and the Folger Fund and was dedicated in 1998. The design called for a four season garden with specimen conifers and evergreens as anchors during winter months. Spring and summer would be dominated by an extensive collection of roses and their perennial companions. The 2016 redesign retained the four season focus and ground covers and additional perennials chosen for their ability to attract beneficial insects were added.

I will admit to some disappointment in this rose garden. All gardens have to be new at some point–I just happened to catch this one not even a full season after its renovation. Additionally, practicality has to reign sometime and the newly planted roses are almost all of the more modern shrub and drift types. This is perfectly understandable given that the Washington D.C. summer humidity inevitably fosters age-old rose issues such as powdery mildew and blackspot and these newer varieties are much more disease resistant. The newer landscape type roses also have less rigorous deadheading requirements and are probably better suited to public gardens than fussier varieties…oh well.

That being said, my nostalgia for the older, more classic multi-variety rose garden has not kept me from also going to the Knock-outs and Drifts in my own garden…

IMG_5798

This urn along with an original 19th century three tiered fountain are part of the Smithsonian Gardens garden artifact collection.

IMG_5801

Here’s our friend from Peace Tree Farms-Lavender ‘Phenomenal’. Lavenders are classic rose companions and this variety is used extensively in this garden. The ground cover Veronica ‘Georgia Blue’ (spring bloomer) will eventual spread to fill in around the lavender and other perennials.

IMG_2784

IMG_5804

Catmint (Nepeta), yarrow (Achillea) and the hardy Geranium ‘Rozanne’ hold promise as mounding ground covers.

IMG_5803

I would love to check back in on this garden in two or three years after the mounding roses have matured and the perennials have taken hold. For now, Kathrine’s garden is new again with promises of what’s to come.

ENID A. HAUPT GARDEN

This 4.2 acre garden is actually a rooftop garden, sitting directly over the underground museum spaces of the National Museum of African American Art, S. Dillon Ripley Center, and Arthur M. Sackler Gallery. It can be reached from large gates on Independence Avenue, from entrances on either side of the Smithsonian Castle or by going out the Castle’s back door.

Philanthropist Enid Annenberg Haupt passionately supported the creation of public gardens and the preservation of horticultural institutions. Her three million dollar endowment made this garden possible as part of the redesigned of the Castle Quadrangle in 1987. The Smithsonian based Enid A. Haupt Fellowship in Horticulture is a much sought after academic opportunity.

The garden is actually composed of three separate gardens: the Parterre, the Moongate Garden Center and the Fountain Garden, each reflecting the adjacent architecture and the culture of the museums below.

As I entered the garden from the east side, the skies opened up and I sprinted to take shelter outside the African Art Museum. An inviting seating area complete with market umbrellas offered me a bit of protection from the shower and I got the opportunity to see several amazing potted plant specimens. The limited soil depth (remember we are standing on top of underground museums) and protection provided by the surrounding museums creates a microclimate milder than is typical of the region. I am reasonably sure none of these would be winter hardy if planted in the ground without shelter from the cold.

IMG_5808
This gardenia was at least 12 feet tall and more than that wide!
IMG_5809
Look at the trunk on this angel’s trumpet.
IMG_5810
Mussaenda ‘Queen Sirikit’ –closeup of the bloom below

IMG_5811

Just west of the museum’s entrance is the Fountain Garden, modeled after the Court of the Lions at Alhambra which is a 13th century Moorish palace and fortress in Granada, Spain.

IMG_5813

At intervals throughout the gardens there are roof vents nestled among the foundation shrubbery, reminders of the museum activity below.

IMG_5818

The Parterre is designed in classic Victorian style to complement the architecture of the Castle. Ornate iron borders harken to an earlier day when gardens full of fussy ornamentation and vast beds of stylized annuals were the mark of an affluent homeowner. Much of the Smithsonian’s collection of antique iron garden artifacts reside in the Haupt Garden.

IMG_5817

A second brief shower drove me into the Castle for refuge and I never got to see the third garden highlight, the Moongate Garden Center. An interesting collection of potted specimens clustered at the buildings steps caught my attention-especially interesting was the unusual coloration on the conifer–maybe a pine?

I regret not taking time to read more about this garden before my visit. There was much to see and several interesting backstories that I missed because I did not do my research. When I return in a few years to check up on Kathrine’s roses and I will give Enid the time and attention she deserves!

From the scientific to the spectacular…

Now that borders have been crossed and delayed luggage has been delivered there’s a bit of time to share with you my final FLOWER FRENZIED experience of this past week in Vancouver and Victoria, British Columbia.

With three very different garden adventures on my trip’s itinerary and no advance plan for the order in which I would do them, I now think their order was providential in giving me an interesting progression of the gardens’ purposes, design aesthetics and plant materials.

The UBC Botanical Garden, by its very nature of being university and research based, is very specimen centered.  There is little to no disturbance to the naturally forested area in which the garden has been developed and plant colonies/collections are allowed to grow and fill areas relatively naturally.  Even though not all plants are natives and there are several areas devoted to plants growing in special type of geography, i.e. the Alpine collection, the overall vibe is calming and very natural.  Many visitors come daily to stroll, read or just relax.  For me it was a close-up garden and I spent a lot on time on my knees examining individual specimens and exploring their leaf and flower characteristics.

The VanDusen Botanical Garden grew from a community’s desire to maintain open and public spaces within the confines of a busy metropolitan area.  The founders saw an existing parcel of no longer used land as a perfect backdrop for building a botanical garden by adding not only shrub and perennial plantings but also many specimens and groupings of deciduous and evergreen trees.  Structures, hardscape paths, water features and sculptures all provide focal points which both harmonize with and are in contrast to the planted areas.  They also make the garden very sought after for private and public events, thus increasing its use by the city’s residents.  This garden offered me many opportunities to view and photograph a variety of plant combinations, both color and texture, and take some of these companion ideas home to try out on a smaller scale.

My final garden stop was the awe inspiring Butchart Gardens in Victoria, on Vancouver Island.  Dave took time off from his conference to join me and after being the lucky last car on the ferry and enjoying the beautiful vistas as we cruised the bay, we found ourselves driving through rolling farmlands to see one woman’s backyard garden.  Jennie Butchart’s vision for a way to use a played out limestone pit and block the view of her husband Robert’s cement plant has evolved over many decades to be an attraction of almost Disney-esque proportions, minus the costumed characters and rides.  The Butchart home was built in 1904 on 120 acres at the base of the Saanich Peninsula near the limestone quarry used in Mr. Butchart’s cement production.  Jennie built her first formal garden, the Japanese Garden,  a few years later with the help of a famous garden designer from Yokohama, Japan.  The Butchart Sunken Garden was developed in the old quarry between 1909 and 1921 and Mrs. Butchart continued to add themed gardens, totally 55 acres, until the late 1920s.  In 2004, the Gardens were designated a Canadian National Historic Site.  These beautifully executed and maintained gardens for me were definitely long view gardens and,  to that end, I offer you a few long vistas of Jennie’s dream.

Butchart 10
Japanese Garden
Butchart 3
Sunken Garden
Butchart 7
Looking up the side of the Sunken Garden wall
Butchart 11
Italian Garden

The Butchart Garden has been blooming for over 100 years and is still family owned and managed. Although it is manicured and maintained on a grand scale, there were still many “take aways” that could be executed on a much smaller scale in my own garden.  Clearly, I will have to increase the line item for tulips in my garden budget by about $100,000!  Having said that, I just can’t resist closing with the photos below.