From the scientific to the spectacular…

Now that borders have been crossed and delayed luggage has been delivered there’s a bit of time to share with you my final FLOWER FRENZIED experience of this past week in Vancouver and Victoria, British Columbia.

With three very different garden adventures on my trip’s itinerary and no advance plan for the order in which I would do them, I now think their order was providential in giving me an interesting progression of the gardens’ purposes, design aesthetics and plant materials.

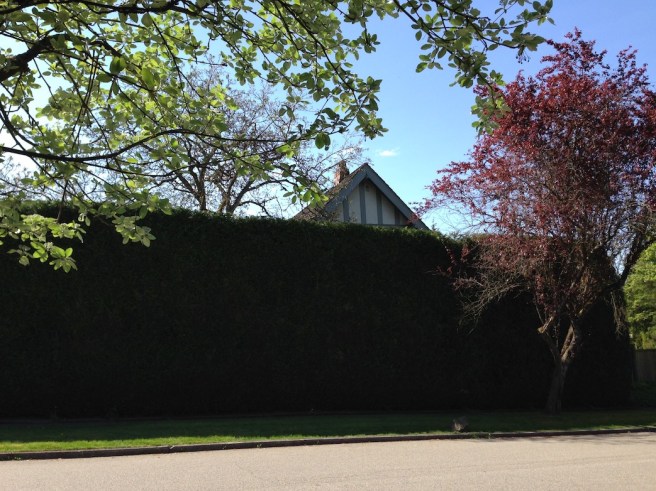
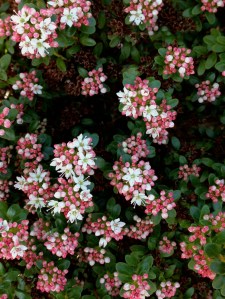
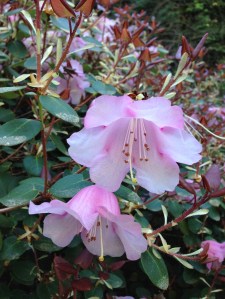
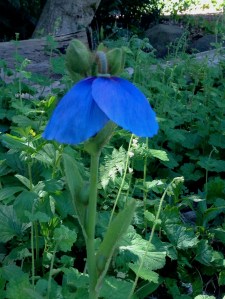
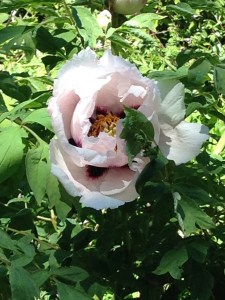
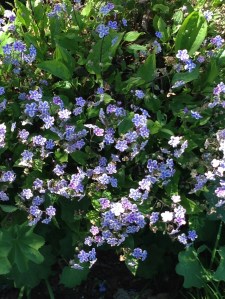
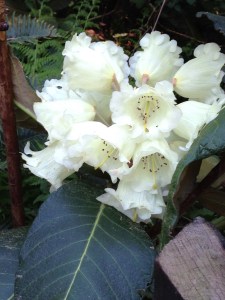
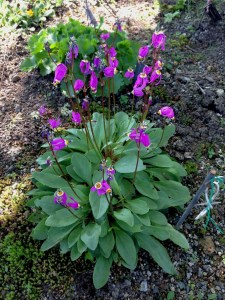
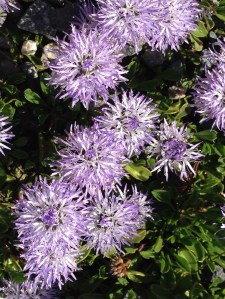
The UBC Botanical Garden, by its very nature of being university and research based, is very specimen centered.  There is little to no disturbance to the naturally forested area in which the garden has been developed and plant colonies/collections are allowed to grow and fill areas relatively naturally.  Even though not all plants are natives and there are several areas devoted to plants growing in special type of geography, i.e. the Alpine collection, the overall vibe is calming and very natural.  Many visitors come daily to stroll, read or just relax.  For me it was a close-up garden and I spent a lot on time on my knees examining individual specimens and exploring their leaf and flower characteristics.

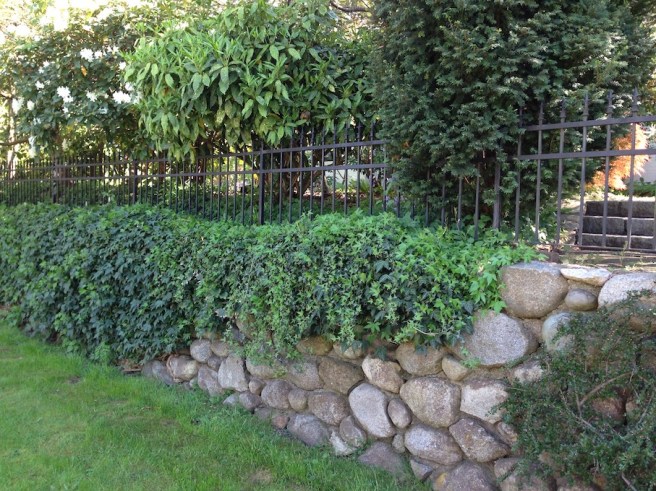
The VanDusen Botanical Garden grew from a community’s desire to maintain open and public spaces within the confines of a busy metropolitan area.  The founders saw an existing parcel of no longer used land as a perfect backdrop for building a botanical garden by adding not only shrub and perennial plantings but also many specimens and groupings of deciduous and evergreen trees.  Structures, hardscape paths, water features and sculptures all provide focal points which both harmonize with and are in contrast to the planted areas.  They also make the garden very sought after for private and public events, thus increasing its use by the city’s residents.  This garden offered me many opportunities to view and photograph a variety of plant combinations, both color and texture, and take some of these companion ideas home to try out on a smaller scale.

My final garden stop was the awe inspiring Butchart Gardens in Victoria, on Vancouver Island.  Dave took time off from his conference to join me and after being the lucky last car on the ferry and enjoying the beautiful vistas as we cruised the bay, we found ourselves driving through rolling farmlands to see one woman’s backyard garden.  Jennie Butchart’s vision for a way to use a played out limestone pit and block the view of her husband Robert’s cement plant has evolved over many decades to be an attraction of almost Disney-esque proportions, minus the costumed characters and rides.  The Butchart home was built in 1904 on 120 acres at the base of the Saanich Peninsula near the limestone quarry used in Mr. Butchart’s cement production.  Jennie built her first formal garden, the Japanese Garden,  a few years later with the help of a famous garden designer from Yokohama, Japan.  The Butchart Sunken Garden was developed in the old quarry between 1909 and 1921 and Mrs. Butchart continued to add themed gardens, totally 55 acres, until the late 1920s.  In 2004, the Gardens were designated a Canadian National Historic Site.  These beautifully executed and maintained gardens for me were definitely long view gardens and,  to that end, I offer you a few long vistas of Jennie’s dream.

Butchart 10
Japanese Garden
Butchart 3
Sunken Garden
Butchart 7
Looking up the side of the Sunken Garden wall
Butchart 11
Italian Garden

The Butchart Garden has been blooming for over 100 years and is still family owned and managed. Although it is manicured and maintained on a grand scale, there were still many “take aways” that could be executed on a much smaller scale in my own garden.  Clearly, I will have to increase the line item for tulips in my garden budget by about $100,000!  Having said that, I just can’t resist closing with the photos below.


The “H” factor…

One of my favorite things to do in any city I visit is wander around the residential neighborhoods looking at both the local architecture and landscape. I had anticipated a sort of British version of upscale Seattle vibe here in Vancouver and from what I can actually see I was pretty close.  My walks to and from bus stops and gardens or shops have been concentrated in the older, definitely upscale areas of the city whose residential histories range from the very late 1880s up to about the 1920s or 1930s. There are many older, very large timber and stucco homes under renovation. I am sure they were and still are beautiful if I could actually SEE them!  Vancouver is a city with the “H” factor—just about every home, from petite to palatial has a HEDGE  shielding its view of the street activity and my view of it. I’ve complied a few of my favorite “H” looks to share with you from my feet on the street time the last two days.

Hedge 1
Classic cottage behind classic hedge
Hedge 4
Probably a really big mansion behind a really tall hedge 
Hedge 8
New house with a hedge in the making
Hedge 7
Very small car in danger of being swallowed by very large hedge
Hedge 5
Seriously gorgeous relaxed hedge of Japanese maples, rhododendrons and mixed evergreens
Hedge 2
Not sure how these folks even got into this neighborhood–they must not be from ’round here but I loved being able to see their pretty house and landscaping
Hedge 6
Hedge behind a great rock wall with a nice iron fence to boot
Hedge 10
Would have killed to see this home with the great copper dome
Hedge 9
Thirty foot high loosely trimmed hedge cozies up to its 20 foot high uptight neighbor–maybe they are sipping margaritas on one side and prune juice on the other…
Hedge 3
You know I have ever so many more pics from this walking tours of hedges in Vancouver but I’ll close on a serious note with this stunning mixed conifer and evergreen hedge highlighted by a lovely entry arbor covered with vines–beautiful home, beautiful hedge

Golf course to garden…

Another day…another botanical garden.  I set out on the #10 Granville bus bright and early heading ‘uptown’ for the VanDusen Botanical Garden.  The UBC Botanical Garden I visited yesterday was somewhat remote from the hustle and bustle of town and, while having much diversity in plant life,  was very much focused on preserving the natural forested area and ecosystem.  I imagine it to be the epicenter of botany research and educational opportunities for both the university students and the community at large.  I admit to having expected to see many more of plants I have always associated with the Pacific Northwest such as hosta, oak leaf hydrangea, deciduous azaleas and dogwood and left having not really made the distinction between what has always grown in this geography and what modern gardeners have filled their landscape with for enough years that I just thought it was from here!  In contrast, VanDusen Botanical Garden is a much more structured and managed horticultural display with flowers, shrubs and trees from all over the world and presented in collections and plantings that are thought out far more carefully than Mother Nature ever would.  And it is smack in the middle of town, surrounded on all sides by homes and businesses.  It is equally as breathtaking as the UBC garden, just in a different way!

The 55 acre garden was part of an original 6,000 acre 1885 land grant from the Province of British Columbia to the Canadian Railroad system and made as an inducement to extend the railroad to Vancouver.  In the early 1900s a small portion of the land was developed as an exclusive residential area known as Shaughnessy.  A golf course was built as part of this development.  Years passed and although the area prospered with many beautiful,  large residences being built and still occupied,  the golf course was eventually abandoned.  In the late 1960s the desire to preserve the golf course land as public space with an eye toward a botanical garden, the Vancouver Foundation was formed.  The 55 acres was purchased and management of the project was placed in the hands of the Vancouver Board of Parks and Recreation.  The Garden was named after philanthropist J. W. VanDusen, then President of the Foundation and donor of 1/3 of the funds needed for the land purchase.  There are 46 plant collections and the areas are linked together in compatible landscape groupings.  The Garden also has a full schedule of adult and youth educational programs and offers professional development for teachers.  Add to that a beautiful gallery with rotating displays of botanical art, a wonderful library, a gift shop and great little lunch place!  Of special note is the new Visitor’s Center opened in 2011.  Its design, inspired by organic forms such as an orchid leaf, presents a harmonious balance between architecture and landscape.  It is also a “green” building which uses less energy, water and natural resources while producing less waste and creating a healthier indoor environment. Below you see an image of the Visitor’s Center and its unique door handles which appear to be made of branches of the Henry Lauder Walkingstick tree.

 Continuing on to the beautiful vista of Livingstone Lake and the  Cascadia Garden.

This wonderful conifer is espaliered over a structure about 30 feet in length and provides a shady entrance to the restaurant.

IMG_2922


The Children’s Garden is home to several playful topiary critters–this one in its infancy.

Children's Garden sea serpent topiary

Photography nor words can do this vista of tulips and forget-me-nots justice as we pass through a formal garden area toward the Rhododendron Walk!

IMG_2923

The Rhododendron Walk pairs the many species of this glorious shrub with companion shrubs, perennials, bulbs and ground covers. The walk has over 600 species and an even greater number of hybrids.  The Walk is generally at its peak in May but an unusually early and warm spring made this beautiful show just for me!

The Rhody Walk and several other areas in the Garden filled my giant hosta wishes.

I was in awe of the variety of trees, both deciduous, evergreen and conifers, that can be found amongst the various collections.  The Pacific Northwest has one of world’s greatest coniferous forests as here they are predominant over deciduous trees because their evergreen needles enable them to continue photosynthesis when deciduous trees are dormant.

IMG_3002

So many photos left to choose from—here are a few more favorites plants that I was thrilled to see thriving in large colonies with amiable companions and a few that I have never even seen in person before.

If you click anywhere in the photos, you will be able to roll the cursor over the individual photos and see a caption with the plant’s common name. Let me know if this doesn’t work for you…first time trying this.

It was clear to me that this beautiful garden is not only a destination for travelers like me but also is a source of respite and relaxation for Vancouver natives.  In my wanderings I passed many groups of two or three folks just strolling and chatting, a lot of moms and grandparents with strollers,  artists sketching and photographers snapping away.  Vancouver residents are truly blessed to have this oasis of green (and every other color) right in their backyards.

Will close with this moment understood by gardeners everywhere……………………………

IMG_3139

Spectacular by nature…

Hello, gardening friends!  I am spending a few days in beautiful Vancouver BC, Canada and what a post card worthy city it is.  It seems as though I can see either the water or the mountains from everywhere I go and from many places–BOTH.  I did not even have to go outside my hotel room to encounter my first garden experience.  From my room on the nineteenth floor of the Pan Pacific Hotel I have a perfect view of the largest “green roof” in North America.  The roof sits atop the Vancouver Convention Center West Building and is home to not only diverse plant life but also over 600 honeybees!

IMG_2743

My first port of call was the University of British Columbia Botanical Garden.  I opted for a city bus ride rather than driving and got to see a lot of Vancouver, from the busy downtown to beautiful homes on large suburban lots.  The UBC Botanical Garden is made up of a number of garden areas including the Alpine Garden,  BC Native Garden, Carolinian Forest,  and the phenomenal Asian Garden.  Not to be missed is the Greenheart Canopy Walkway and that is where I started my adventure.  As I was a tour group of one I got special attention from my guide,  JoAnn.  The Canopy Walkway is an aerial trail system which allows you to journey through the upper parts of the forest canopy by navigating 10 suspended walkways  or bridges which connect 8 platforms.  Most platforms are about 50 feet above the forest floor–one has a secondary spiral staircase leading to a 70 foot high viewing deck.  The Greenheart Company specializes in nature based walkways and eco-attractions and has built canopy walkways in Central and South America and Africa.  The design and engineering of these canopy walkways does not damage the trees or the delicate surrounding ecosystem as the platforms and walkways are hung from the trees using a cable tension system.  No nails or bolts!  As I am not great with either heights or motion the tour was not without anxiety for me but we took it slowly and I am so glad I pushed myself.  Definitely no ziplines on my bucket list! At each platform JoAnn pointed out trees of note and shared with me how various plant materials were used by the people of the First Nations (Native Americans, only Canadian.)  Really an awesome experience.

IMG_2749

After communing with those 100 year old trees up close and very personally I returned to the earth to spend the balance of my afternoon wandering through the various gardens in awe of the huge rhododendrons, fields of various ferns and many species of plant life I know only from pictures in books.  Although the garden’s inhabitants are well marked often the markers were too far off the paths for me to see so a few of the gorgeous specimens I photographed will probably remain nameless.  Here are some highlights–how many can you name?

Getting your little ones on a schedule…

Having a weekend free of commitments and significantly hotter days forecasted for next week I set about to do the first deadheading of a couple of groups of roses.  No plan to shop, eat out or even take a road trip—no better way to spend a weekend than deadheading roses.  Is that a commentary on my life, or what?

When we bought our home in 2008 it was 8 years old and most of garden beds appeared to have the original landscaping from 2000, the year the house was built.  Knowing I would change a lot of it I spent our first 6 months surveying what we had and how it performed.  I probably should have taken a year but the 6 months put me into March and how could I resist a new gardening year?  Clear winners of the “what stays and what goes” conversation were several groupings of pink and red miniature roses.  Their companions, orange in color, lost the toss.  Doing some research on these little beauties at a local nursery, Gazebo Gardens,  they were identified as Sunblaze miniatures, Sunblaze Pink and Sunblaze Red from Star Roses.  I also learned that the Sunblaze Pink was no longer being grown, having been replace by a new and apparently improved pink called Sunblaze Sweet.  After a short but intense period of mourning at not being able to obtain additional plants identical to my pink miniatures I simply rearranged what I had and moved forward.  I have the pink and red alternating in areas of 2 beds and they have performed magnificently for the last 7 years.

I have developed a deadheading regimen for the Sunblaze Pink roses that gives me 6 or more blooming periods, each lasting about 8 weeks.  With a little variation here and there for weather (hot) and water (very little) they respond with clockwork precision.  A little disclaimer here—I am not a rosarian or in any way educated about roses, except what I have read and gleaned from others.  I was a Master Gardener when I lived in Georgia but as roses are very challenging in that humidity and fungus ridden garden environment we got very few calls needing help with them.  I can only share what has worked for me, in my garden with these particular roses.

In my Central Valley of California we routinely strip the flowers and foliage off our roses mid November in an attempt to force them into dormancy and get them ready for annual pruning.  I prune all my roses about mid January. In many places this would be considered very early but if we have a mild winter and an early spring you could be looking at new growth on plants you have not even gotten the clippers to yet.  The Sunblaze Pink responds to this hard prune by popping out new growth within a few weeks depending on the weather.  Dependably I have buds, and then the first open flowers, by the third week in February. Below you’ll see one of the beds photographed about mid March.

IMG_2624

You can see here that the Sunblaze Red are naturally smaller than the Sunblaze Pink but they both look lovely in combination with the dark purple iris and the smaller lavender. In the next photo you can see the roses have reached their bloom cycle peak.  This photo was taken on April 7th.

4-16-16 Pre-pruning

I tend to deadhead quite aggressively and, according to some of my gardening gals, a bit too early in the cycle.  I find that if I wait til all the roses on any given plant are spent I’ll be looking at cutting back around new growth or life will just get in the way and things won’t get deadheaded at all. The photo below was taken this morning and it a good representation of the point at which I go looking for my clippers—noting that I am about 7 weeks past the emergence of the spring growth.

Flower staus pre-pruning

I have spent flowers, flowers in their prime and even some buds.  They all have to go!!  It takes a great leap of faith to cut off perfectly good flowers but you are just that much closer to the next bloom cycle. To cut these to bring inside for a vases or a bouquet you would have to pick through all the dead ones to get anything decent anyway.  Also lessening the flower murder stress is that our first bloom cycle is in prime time for the hoplia beetle.  These miserable critters use the blooms on white and light colored flowers as their own personal love shacks.  They emerged from the soil about mid March, fly up to and mate in the flowers all the while munching on the flower’s petals to keep their strength up.  Then the female lays her eggs in the soil where they overwinter as larvae.  If you look closely in the above picture’s upper right you can see one of these bugs sticking out–they are often mistaken for Japanese Beetles.  They are most effectively controlled by handpicking and squashing–yuck.  I have enough yuck in my yard stomping snails–do I really need this?  The good news is that they will be gone by the second bloom cycle!

So I have spent about 3 hours with my clippers on a total of 8 Sunblaze Pink roses.  I think this is a good trade for the promise of the next bloom cycle. Typically these bushes rest for about 2 weeks and then start pushing out new growth.  In 6 weeks I will have a clean new flush of blooms to enjoy for a couple of months.  Then I’ll just do it all over again! By the way, the 5 Iceberg tree roses you see in the background of these pictures got their first trim back today also and will follow much the same cycle as the Sunblaze Pink. Interestingly enough, the Sunblaze Red are exceptional ‘self cleaners’. Their flowers dry and drop very cleanly on their own, they will rest then come back into bloom without any human intervention almost on the same schedule as their neighbors.  Isn’t nature wonderful?

4-16-16 first deadhead back

So here you can see the fruits of today’s labor.  The second bed containing these same roses looks much the same.  Put your timers on and I’ll give you a heads up when we have flowers again.

Covering a little ground…

To a gardener a good ground cover is a lot like a stand out sauce is to a cook—it can go along way toward deflecting attention from any mistakes you made on the main course!  Ground covers will wind their way through your other plantings unifying diverse colors and forms. They can provide erosion control, take the place of lawn in areas where lawn will not thrive or is not needed for foot traffic, and cover the feet of plants whose growth habit tends to leave them a bit bare below the knees.

Ground covers come in all shapes and sizes, foliage textures and colors. Many, although not all, have colorful flowers desirable for your garden in their own right. Some are clumping while some spread by underground runners. They could be evergreen or all but disappear in the winter’s cold to come roaring back with the rest of your perennials in the spring. In large scale planting areas you may even opt for masses of closely planted shrubs, such as abelia, juniper or rosemary to fulfill the ground cover function.  More and more roses are being bred specifically to stay fairly low and plant en masse with little of the traditional rose care being critical for successful blooming. While we often think of vines as being plants we use to cover trellises or other structures to add vertical interest, many vines do admirably well finding their way on the ground to fill in large areas—ivy and star jasmine are perfect examples of vines used as ground covers.

When choosing plants to act in the ground cover role you must still look at sun/shade, soil and water requirements.  This can seem complicated if you are trying to fill an area which may go from sun to shade or have a soggy spot in it.  My experience is that whatever you pick will grow to the breadth of its comfort zone and you’ll see soon enough that the uncovered areas need an alternate pick.  I have an area in a north facing shade bed filled with Anenome ‘Honore Joubert’, a lovely and fairly invasive perennial which needs afternoon shade in my area.  As the bed edges forward and abruptly loses the shade of the house, thus falling into the direct southern sun—-the anemone stops!

A couple of my favorite ground covers have been pictured in previous posts: Geranium ‘Tiny Monster’ and  Dianthus ‘Firewitch’. Here are a few more:

Veronica ‘Waterperry Blue’ is a lovely little 4-6″ high trailer which blooms early in the spring.  Very polite, tolerant of both sun and shade and and providing a lovely contrast in my garden when planted under pink and red Sunblaze miniature roses.

IMG_2603

Mazus repens ‘Alba’ is another little clumper-trailer.  This one brightens up my shade bed bordering my back patio.  It required a good bit of neatening up early this spring but by May or so it will have filled back in.  Yet another spring bloomer with almost chartreuse foliage.

IMG_2605

This one is a little more unfamiliar and hard to find.  You might find it labeled Phyla nodiflora or Lippia repens.  Its claim to fame is the ability to withstand foot traffic and can be a lawn substitute for smaller areas.  It can even be mowed and bounce back pretty quickly!  The flowers are reputed to appear spring through fall but in my garden I have only spring bloom.  I does form a very tight mat of both above ground stems and underground roots and can be hard to eradicate if you find you don’t love it.  This photo is of my original 4″ pot purchased 2 seasons ago.  It now fills the entire area of the rose bed it is in–about a 10 ft diameter circle boundaried by pool deck and grass.

Mystery groundcover from Plant Depot 5-13

Hellebores may not be considered traditional ground covers but they are indispensable if you want to fill the areas beneath high branching hardwoods and conifers.  They are naturally understory plants, unbothered by root competition and flourish in the forest floor environment created from leaf and needle drop.  They are commonly called Lenten Rose or Christmas Rose depending on the species.  While they bloom in the fall through late winter, their strong, leathery, dark green foliage persists throughout the year.  In masses they make a statement even when not in bloom. Hellebores are prolific reseeders and if left in place will form huge colonies of new seedlings. The only downside I have ever seen was that the seedlings take several years to reach blooming size—this surely accounts for their relative pricey-ness in the retail nursery market.  The seedling’s bloom color is not necessarily true to the parent plant and there is much variation from white to cream to pink.  The plant pictured is 9 years old and was originally a seedling from the garden of my dear friend, Mary Sims, in Macon, GA.  There is intensive breeding going on the the hellebore world and you can find many new named varieties and color variations in specialty plant catalogs.

IMG00001-20110304-0834

Also a little non traditional but very effective in large swathes are Daylilies (Hemerocallis.)  These clumping beauties provide clear green foliage most of the year (depending on variety and where you live) and offer more color and form variety than almost any other plant group except possibly roses. Go for at least 3 plants of each variety and lay them out blending your colors as you fill your bed.  You cannot go wrong!  For a feast of offerings try Oakes Daylily Farm in Knoxville, TN. Their catalog is extensive and the many plants I have ordered from them have been in excellent condition with large healthy scapes ready to go in the ground.

Barbara Mitchell daylilies 6-05

My last offering for today takes us back into the more traditional ground cover world.  I first saw this plant in action in a lovely sun filled space in one of the gardens on the Gamble Garden tour in Palo Alto, CA and I was instantly a fan. While their weather is more temperate than where I live, the plant was a foot high mound about 3 feet in diameter out in the very hot sun without any protection. It almost glowed! This is Convolvulus mauritanicus ‘Morrocan Blue’  and is commonly called ground morning glory.  What a charmer it is.  I established it just last spring in a very hot, dry area of my side yard that gets little to no attention and it has really made quite a show as the “skirt” for some lovely, very tall white bearded iris.

Convolvolus mauritanica 4-16

There are so many more to share with you I’ll need a “part deux” ground cover post.  We have not even talked about the campanulas, lantanas, or verbenas! Until next we garden together…

Social climbers…

There are not enough weekends in April and May to be able to take in the many wonderful garden tours available to us!  I starting doing garden tours in earnest when I first moved to the South in the late 1990s.  The expansive gardens filled with wide swaths of flowering shrubs and bulbs were just so different from the beautiful but smaller and more detailed gardens commonly on tour in Southern California.  At one point I found myself trying to figure out how I could be in Georgia, South Carolina AND Alabama all on the same weekend.  They were all just too good to miss.  Adding to that space aged travel dilemma was my desire to hold on to my favorite California garden events too!

On one of my trips back to Southern California to attend the Mary Lou Heard Memorial Garden Tour I came face to face with the climbing rose which sparked my desire to have these beauties in my garden.  In this case it was a magnificent ‘Berries and Cream’ climber in the front yard of a small and tidy home in Fountain Valley.  There are few plants that can snarl garden tour foot traffic as surely as a climber massing over trelliswork 8 feet high and 10 feet wide and in full bloom.  Gardeners with yards large and small, from all walks of life, stop to chat about the beauty of a robust climbing rose.  As an aside to this climbing rose story let me encourage you to check out this wonderful tour which is held yearly, usually on the first weekend in May, and was started in memory of the owner of an iconic cottage garden nursery and shop in Huntington Beach, CA.  The tour encompasses 30+ gardens across Orange County and the funds raised from tour-goer’s donations is earmarked for the Sheepfold, a shelter for women in crisis and children.  See their website heardsgardentour.com for the details of this year’s event.

So roses, climbing or not, were a challenge for me in humid Central Georgia.  My few attempts were less than successful in a land where black spot and other fungal diseases reign supreme.  Returning to hot, dry Central California opened new opportunities to check “climbing rose” off my garden bucket list.  Roses are much beloved in my city and many varieties are available starting in January.  Roses can be seen in their glory from March through November.  We are a bit challenged by our often mild winters and you have to force yourself out into your garden in late November or early December to cut off perfectly good flowers and strip still green foliage to force your plants into dormancy to prepare them for full on pruning in late January.

Having solved the humidity/disease challenge by moving 3000 miles west I now had a more formidable challenge to surmount.  By their nature climbing roses need structure–trellis work, a pergola, fences to scramble on to mention a few possiblities.  It is sort of a “if you build it, they will grow” kind of thing!  My husband is very supportive of most of my garden dreams and plans until they involve construction or worse yet–letting something grow up the side of the house or attached to a fence.  This probably results from an ill fated episode in our first garden together when I planted creeping fig and encouraged it to grow up the side of the house, resulting in a close relationship with the gentlemen who you hire to re-spray the stucco and pay by the square foot.

The death of a large Photinia fraseri on our west fence line presented a wonderful opportunity.  My husband cut back all the small branches, leaving the trunk and larger branch structure in place and I went to my local rose gurus, Gazebo Gardens, to purchase my first climbing rose.  Notice that I did not say that I researched varieties, lengths of canes, blah, blah, blah.  Just went right out and bought one I liked—a floribunda climber named ‘Fourth of July’.  Had I done the research we might have left even the small branch structure intact on my tree trunk trellis as this magnificent rose’s climbing canes can surpass 12′!

Climbing Rose Fourth of July

‘Fourth of July’ is now entering its 4th bloom season and it requires me to stand on the top step of an 8 foot ladder to do the pruning and cleanup work in January. What you are seeing below is just the top or head of the upward trained climbing canes—there is another 5 feet below where the canes are tied to the dead tree trunk!

IMG_2615


Good thing I started with a robust and very forgiving climber!  I have since added two more selections to my garden and learned that there is way more nuance and sophistication to these gems than I realized.  My next selection was destined for a more traditional metal trellis easily seen from our back patio.  I now realized there could be much variation in the natural growing length of the canes by variety and specifically chose one whose canes were in the 8 foot range so it would not overwhelm my support.  This sparkling lovely is called ‘Morning Magic’ and comes from the breeders who gave us the Knockout Roses.  It is a delightful shell pink and almost seems to shimmer in the early morning sun.


My rose expert friends tell me I need a good bit of corrective pruning in my attempts to cover my framework well but I am not unhappy with my efforts so far—this is the 3rd year in the ground for this magical rose.

The last climber I bring you is ‘Eden’.  We built the pavilion you see in the photo under the blog title in 2011.  It provides us with an additional shady spot for entertaining and we often eat in the pavilion on summer evenings. Feeling it needed some ‘softening’  we added the painted trellis work in the fall of 2013. The trellis has 6 uprights, four of which are planted with ‘Eden’.  Fearing a rose might overwhelm the space which functions as the main entrance those two uprights are planted with Lavender Trumpet vine—-this vine is known to be a slow starter but it has definitely underwhelmed me.  Moving the rose canes toward the top horizontal crosspieces has been quite challenging with lots of tying and tweaking.  At the beginning of its 3rd year I have only one cane up on the horizontal  and I have found identifying the climbing canes to be more than problematic for my novice pruning skills.  I will persevere in hopes of seeing a bride and groom standing under a glorious profusion of roses in a couple of more years!! Are you reading this, Joshua?

Climbing Rose Eden Spring 2014
First year in the ground

IMG_2610

IMG_2612
Where we are today!

Go, ahead! Become a social climber.  You will be rewarded with almost endless beauty.  Happy planting from my yard to yours!